June 25, 2009 By Amanda Padgett

As you know, I recently had BBD critiqued at BlogCoach and one of the main things suggested was adding a navigation bar (nav bar) or menu bar to the site. By doing that I could eliminate all the long lists in the right-hand sidebar and give the blog a cleaner look and make it easier to use.
I began searching on how to create my own nav bar and found some tutorials, like this one at April Showers or this one by Adori Graphics The average blogger can make their own, and I could have if I had the time. However, I have so much going on that I asked Summer from Designs by Summer to handle that for me. She was awesome and within 36 hours my nav bar was designed and installed! And, I only paid $15!
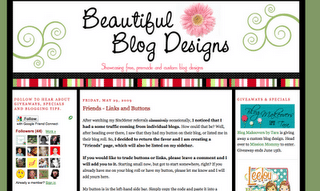
Here is a shot of BBD before the nav bar was installed. (Sorry the images are different, I didn’t have a “before” picture, so I borrowed this one from BlogCoach.)

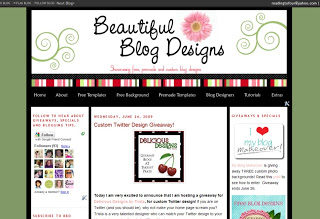
Here is the blog after Summer installed the nav bar:

Notice that the change is subtle, but very effective. The long lists are gone and I now have an “about” section which will help readers understand BBD and me a little better.
Now when visitors stop by the blog (or my wonderful followers), they can click on one of the categories in the nav bar and go right where they want to go. And, they can also click on home to go back to the main page (I love that feature).
So, if you have a lot going on in your sidebars such as awards, buttons, blog lists, etc., consider creating a navigation bar for yourself, or hiring a blog designer to make you one. Your blog will look cleaner and more polished, and your readers will appreciate it!
If you receive my posts via a reader and haven’t seen the changes I have made to BBD, please pop in and let me know what you think. I have more additions planned, but they will happen later in the summer.
p.s. Don’t forget to enter the giveaway for a custom Twitter design