May 11, 2011 By The Blog Designer Network
WordPress is without a doubt an excellent platform to have not only a blog, but a website too. It offers many “fancy” functionalities for website owners, and can be super simple for someone who just wants to start a blog!
There is a huge difference between WordPress.com (the free platform) and WordPress.org, your own self-hosted WordPress blog. Simply put, having a blog on either Blogger or WordPress.com are close to the same thing. You can see a comparison table between WordPress.org, WordPress.com, and Blogger at How Joyful Design Studio.
This will teach you how to set up your own self-hosted WordPress.org blog.
Buy a Domain Name: Your domain name is what people will type into their address bar to get to your site. Ours is theblogdesignernetwork.com. We also purchased blogdesignernetwork.com and thebdn.com, which both direct to the same place! We suggest using GoDaddy.com for purchasing domain names, however many hosting providers (such as the sponsors in our sidebar) offer free domain names as an incentive for hosting.
Purchase Hosting: Unlike free blog platforms like Blogger or WordPress.com, you will need to purchase a hosting plan through a server of your choice. This is like renting “space” for your blog on the web. The prices vary from only $2 per month, up to $10. We suggest RFE Hosting, Dreamhost, Bluehost, or Hostgator. See our sidebar for their ads and possible discounts!
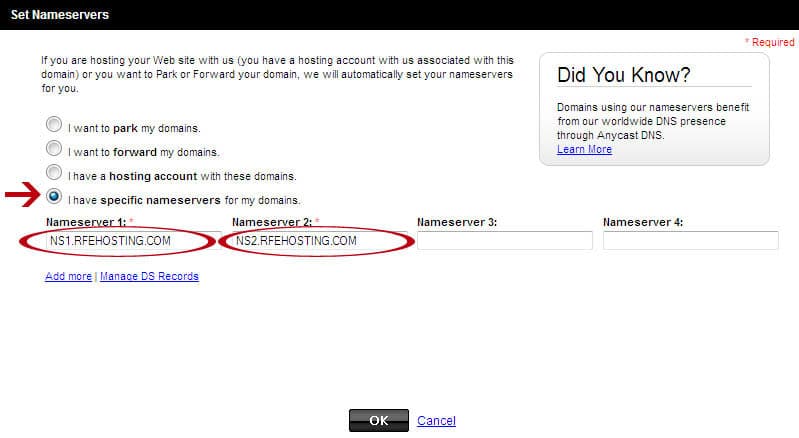
Link the Domain and Hosting account: If you purchased your domain name through your hosting provider, you can skip this step. You should get a welcome e-mail from your hosting provider. In the e-mail it will identify your “nameservers” which may look something like this:
ns1.(hostname).com
ns2.(hostname).com
Example: ns1.rfehosting.com
ns2.rfehosting.com
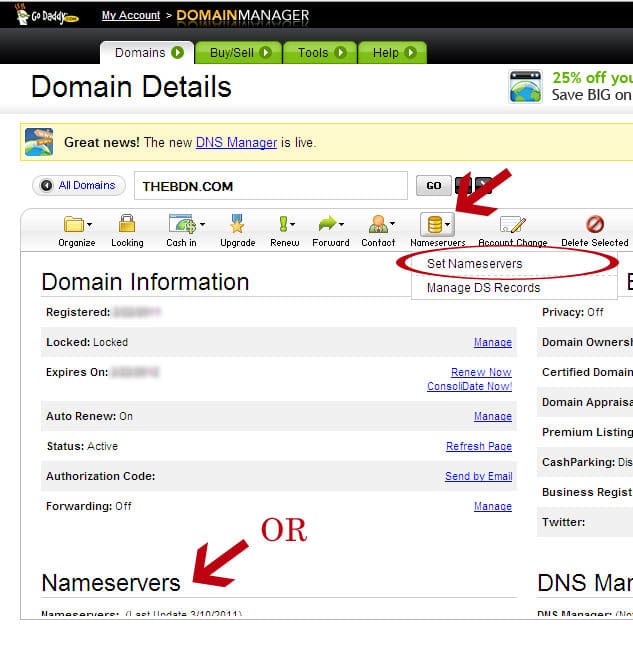
Now log in to GoDaddy, or wherever you purchased your domain name from. For GoDaddy, click on “My Account” in the upper right hand corner. Find your domain name and click on the blue link to the right of your URL that says “Advanced Details.”
Then (see image below) click “Set Nameservers.” For any other domain registrar, look for domain settings, then nameservers.
Important: Your domain and hosting account may take up to 48 hours to complete this process.
Install WordPress: Once you have purchased your domain name and set up your hosting account, you’ll need to install the WordPress software onto your account. Your hosting provider will likely make this REALLY easy for you since WordPress is one of the most popular reasons people sign up for hosting. For most hosting providers you will have access to what is called a “Cpanel” and it looks like this. (Your hosting provider will customize it with their own logo.)
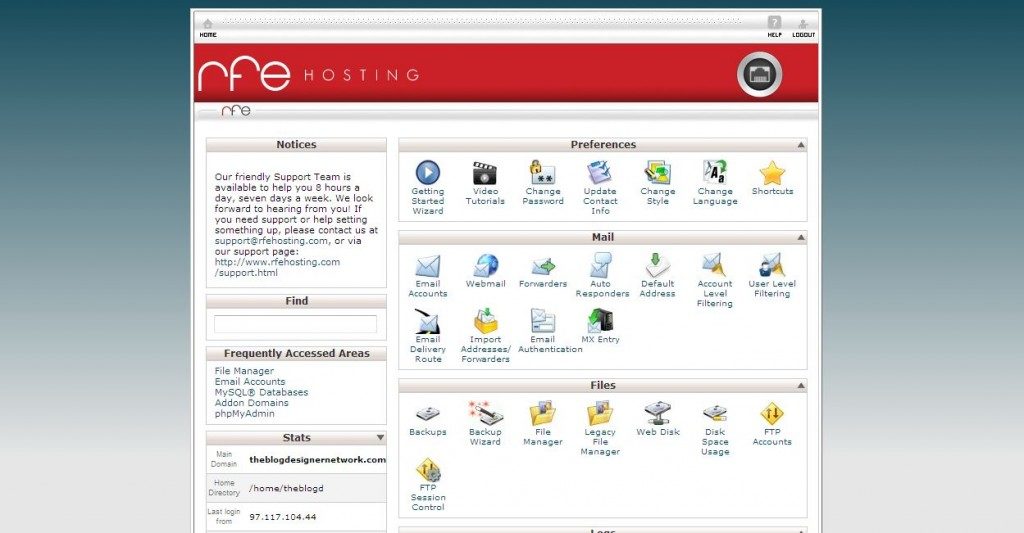
Then scroll down to the “Fantastico De Luxe.”
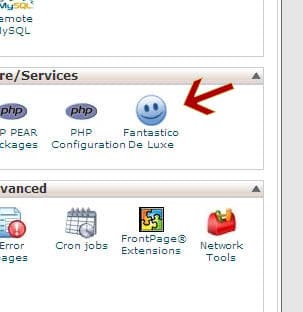
Select “WordPress” and “New Installation” as specified below.
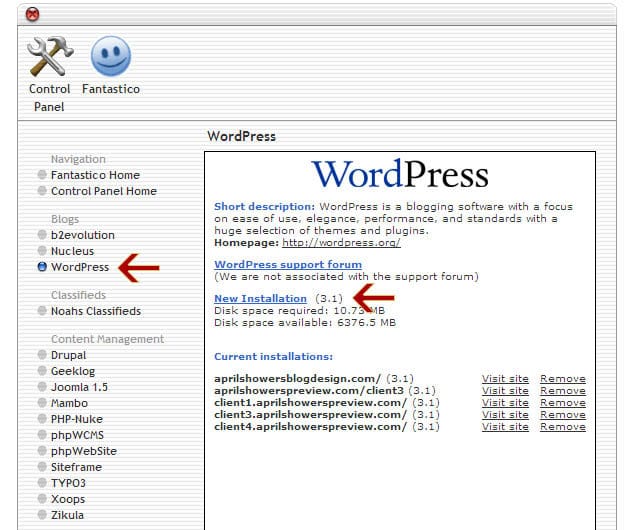
Fill out the information they request, and click “finish.”
In GoDaddy, simply Login and go to your Domain Manager. Then click “Hosting Accounts” and find the “Launch” button next to your hosting account. The “WordPress Install” link will be on that page. Just click it, and it will guide you right through the process of installing WordPress!
Once WordPress is installed, go to:
yourdomain.com/wp-admin (Use your own URL.)
and
yourdomain.com/cpanel (Use your own URL.)
The first URL will take you to your WordPress dashboard where you can make posts, change your theme, and launch your blog! Login using the username and password you set up during installation (not your hosting account username and password.) The second URL will take you to your control panel, where you can set up e-mail accounts, make subdomains, manage your files (like header, background, etc…), and much more!
If you have any questions about this tutorial, visit our new forum and ask away!